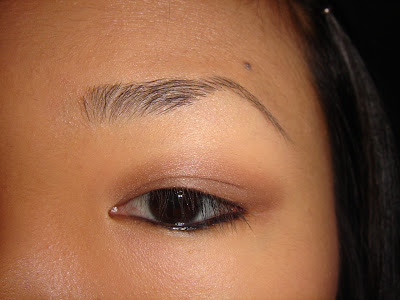
Today I'll show you my grab-n-go look, if I don't have much time to play but need to look groomed, somehow lol.

I call it the Natural brown smokey eyes, it's really easy and quick (15min., 10 if you don't need to curl your lashes). You will need the following items (description below pic):

From left top row to left bottom row clockwise:
- MAC Mixing Medium Waterbased
- MAC Carbon Eyeshadow
- Giorgio Armani Eyeshadow #11
- Clean Mascara Wand
- Shu Uemura Eyelash Curler
- Yves Rocher Waterproof Mascara
- Urban Decay Primer Potion
- Shiseido Maquillage Concealer
- Chanel Crayon Kohl in Marine
- MAC Eye brush #219
- Foam applicator
- MAC Eye brush #266
Now start with no makeup... I reuse the first few pics because the steps are always the same...
1. naked eye lol

Now get your Primer Potion and dab a tiny amount on your upper eyelid and blend. Do the same with an even tinier amount on the lower lid.

Here the new pictures start lol: take the Chanel Crayon and line your lower waterline and 1mm beyond it.

Now dip the foam applicator into the brown e/s (the Armani in this case, MAC Satin Taupe is a close dupe). Apply on your upper lid.

Wipe with a clean fingertip to blend the shadow into your foundation/skin.

Now open your Carbon e/s, drop a tiny amount of Mixing Medium onto it and stir with the 266 brush to get a creamy color (I always use one side of the shadow only, because making it wet will harden the surface). Start to line on the inner corner as close to your lashes as possible.

The lining serves to even out my eye shape and to make lashes seem longer:

Here comes the Curler:

Put the curler as near to the lash roots as possible. Be cautious not to pinch your eyelid. The pain will cause your eye to water and ruin the makeup unless you know how to suck it up with a tissue.

Pinch from root to tip. Do it several times if needed to achieve your desired curl. Then apply mascara in a wiggling motion from root to tip to evenly coat each lash.

The Kohl on the lower waterline is always smeared afterwards, so I use a clean fingertip to blend the color into my skin.

It will look like this:

It softens the harsh line. Again blend with a clean fingertip to make any lines between brown e/s and skin disappear. Now we're ready to to!
Looks a lot fresher than the naked eye, what? Next time I'm gonna do a much more complicated hot goth eye look. A request from a friend ;D


i love love LOVE your tutorial posts. =) thank you for taking the time to make em...i cannot wait to see more...=)
ReplyDelete