As promised I'm gonna do a tutorial for the following makeover.

I call it a Simple Smokey Eye because all you need are 3 different eyeshadows (and some other gear). Since everyone's face makeup (foundation, concealer, blush) varies I will only include the products you need for the Smokey Eyes. Read below the picture for exact things:

From bottom left clockwise:
- MAC Carbon eyeshadow
- MAC Knight Divine eyeshadow
- Chanel Crayon Kohl in Marine (dark grey base with blue shimmer)
- MAC Eyebrow Pencil (mine is Velvetone, yours depends on haircolor)
- Yves Rocher Waterproof Mascara in black (every other waterproof Mascara should work, Great Lash is nice too, as long as it's WP! Why? Because I have heavy Asian lashes, only WP formula keeps the curl)
- Urban Decay Primer Potion
- MAC Brush #266
- MAC Brush #213SE
- MAC Brush #266SE, why twice? You'll see...
- MAC Brush #219
- P2 Eyeshadows (it's a cheap brand, you only need some frosty white, every other one will do to)
- Sponge applicator (mine is from H&M)
- Shu Uemura Eyelash Curler
Ok now that's what you need. My tutorials start with the naked eye. Yuck... well don't forget to put on a moisturizer before the fun begins.

Put on foundation to make your complexion look even. I use MAC Studio Fix Fluid NC30 and blend with fingers.

Then dab concealer under your eyes to erase undereye shadows.

Blend into foundation with a finger. Your eye's skin should look less tired now, but artificially even colored lol.

Next is the HG primer: Urban Decay Primer Potion. Dab a tiny amount on upper lid and blend with a finger. Do the same on your lower lid.

You shouldn't be able to see the primer, otherwise it's too much.

Now take the Chanel Kohl. Draw your waterline and be careful not to poke your eye out.

Don't press to hard... my dumb look below results from trying to photograph myself whithout killing my eye with the other hand.

Line, line... might take some time. MAC Feline is darker than this and glides on easier, but I find it too harsh looking sometimes.

Line until your waterline and some additional 1mm are deeply colored.

Grab the sponge applicator and swipe over Knight Divine.

Put the color onto your lid.

Blend! Add color if needed (I need to because I want lots of color).

Finally blend the edges with a clean finger. The result is this:

Then take the fluffy #213 brush and get a bit of frosty white e/s.

Place it below your brow.

Blend it into Knight Divine with the brush.

Make sure that there are no harsh lines (clean finger works best!).

Now put a tiny drop of water on Carbon and mix it with the help of the #266 brush. Make some creamy black color and press each wide side of the brush flat.

Now draw a flat line across your lid, as close to lashes as possible.

The thickness depend on your lid. If you have smaller lids, make a thinner line.

It's time for curling now.
Put the curler as near to the lash roots as possible. Be cautious not to pinch your eyelid. The pain will cause your eye to water and ruin the makeup unless you know how to suck it up with a tissue.

Pinch from root to tip. After one time it will look somewhat like the following, not very convincing...
So, take the curler again and pinch as often as you need to get your desired curl. This part always takes the longest for me.

When I'm satisfied my curled/massacred lashes look like this:

Now the mascara comes to bring them into life. Place the wand near the roots and move upward to the tips in a wiggling motion. This will distribute color evenly.

After one coat they are a bit clumpy:

I separate them either with a clean mascara wand or my nail file. But be careful... I'm not responsible for any injuries :P

Repeat the mascara and separating until you are happy.

Blend the Kohl that got on your lower lid with a finger.

The lower lid should look like this and is ready for eyeshadow.

Now get the #219 brush and dip into Knight Divine.

Line the lower lid starting on the inner corner. Get more e/s on your brush throughout the line.

Your lower lid should look like the following:

Grab the Kohl again and line if your waterline lost color during the process.

Looks slightly more intense now.

Take the #219 brush again and dip in Carbon.

Now line the area between your waterline and the line of Knight Divine to create a blended effect and add smokiness.

We are almost finished.

Next come your lower lashes. Pull out the Mascara wand again and color your lower lashes. Attention! It's easy to slip and color your lower lid to...

Let them dry unless you want instant racoon eyes.

Now comes the very last step: the eyebrow definition.

Here you can start to play 'spot the difference' since we are only doing the finest details now.

Get the other flat #266 brush and draw in the direction of hair growth.

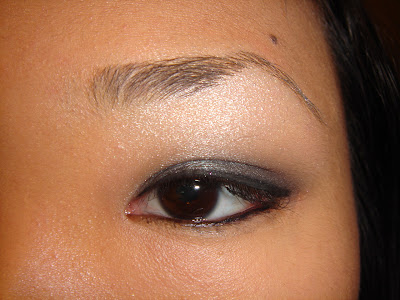
Here is the final look:

Looks a bit different from the very first pic ;D I hope you liked the tutorial. If you have any question or suggestions just leave a comment! Tomorrow I'm gonna do some green or violet... we'll see ;D
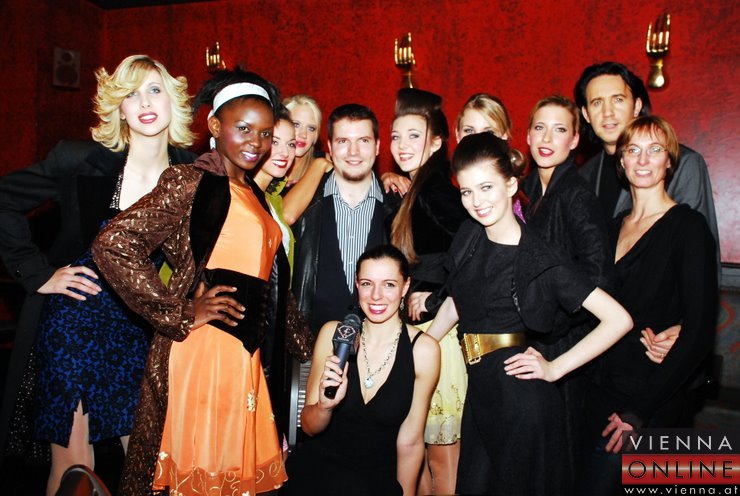 I'm also on the pics in the gallery... twice lol. But I won't tell you which one :P Back to the fashion show itself: the clothes aren't my cup of tea and most models couldn't walk properly. I dunno how pro they are yet... It was interesting nevertheless. I'm supposed to be on the fashionTV video, but I don't have an account to watch the whole vid... if you could help me out I'd appreciate it so much I'd do a tutorial for ya! :P Just write an e-mail to treyjones@mail.com ;D


